This blog post talks about how to set up a Kubernetes cluster. (Kubernetes series P1)
Introduction
In part 1, I will provide instructions/information on how to set up a Kubernetes cluster using Kubeadm. Part 2 will teach you how to enable logging in your cluster - to collect host and kubernetes logs. I’m not sure if this is the best way to set up a kubernetes cluster but it works for me. I followed a bunch of guides and finally managed to get my nodes working.
Guides and Videos
There are plenty of guides and videos on youtube that you can follow. I found that this tutorial 🔗 works best for me. They have a video guide 🔗 as well. Lets follow the guide! To get started, make sure your VMs are in the same subnet! If you’re using VMware, you can configure them to use the same subnet.
Disable swap and set hostname on all nodes
# Disable swap on all your nodes
sudo swapoff -a
sudo sed -i '/ swap / s/^/#/' /etc/fstab
# You can check swap using
sudo swapon --show
# Change the respective machine's hostname to something more relevant
sudo hostnamectl set-hostname "master-node"
sudo hostnamectl set-hostname "worker-node1"
Update /etc/hosts on all nodes
Make sure that you use the ip of your nodes. You can find that from ifconfig. Update all your nodes with the correct
# In your respective node's /etc/hosts file:
192.168.182.157 worker-node1
192.168.182.156 master-node
Set up IPV4 bridge on all nodes
cat <<EOF | sudo tee /etc/modules-load.d/k8s.conf
overlay
br_netfilter
EOF

sudo modprobe overlay
sudo modprobe br_netfilter

# sysctl params required by setup, params persist across reboots
cat <<EOF | sudo tee /etc/sysctl.d/k8s.conf
net.bridge.bridge-nf-call-iptables  = 1
net.bridge.bridge-nf-call-ip6tables = 1
net.ipv4.ip_forward                 = 1
EOF

# Apply sysctl params without reboot
sudo sysctl --system
Installing kubelet, kubeadm, kubectl and docker on all nodes
The instructions from the guide does not work for me. Instead I used instructions from Kubernetes docs.
sudo apt-get install -y apt-transport-https ca-certificates curl
sudo mkdir /etc/apt/keyrings
echo "deb [signed-by=/etc/apt/keyrings/kubernetes-apt-keyring.gpg] https://pkgs.k8s.io/core:/stable:/v1.28/deb/ /" | sudo tee /etc/apt/sources.list.d/kubernetes.list
curl -fsSL https://pkgs.k8s.io/core:/stable:/v1.28/deb/Release.key | sudo gpg --dearmor -o /etc/apt/keyrings/kubernetes-apt-keyring.gpg
sudo apt-get update
sudo apt install -y kubelet kubeadm kubectl
sudo apt install docker.io
sudo mkdir /etc/containerd
sudo sh -c "containerd config default > /etc/containerd/config.toml"
sudo sed -i 's/ SystemdCgroup = false/ SystemdCgroup = true/' /etc/containerd/config.toml
sudo systemctl restart containerd.service
sudo systemctl restart kubelet.service
sudo systemctl enable  containerd.service
sudo systemctl enable kubelet.service
Initialize the Kubernetes cluster on the master node
sudo kubeadm config images pull
# Take note of the stdout for this command as there will be an important token to note down.
sudo kubeadm init --pod-network-cidr=192.168.0.0/16
mkdir -p $HOME/.kube
sudo cp -i /etc/kubernetes/admin.conf $HOME/.kube/config
sudo chown $(id -u):$(id -g) $HOME/.kube/config
Configure kubectl and Calico on the master node
kubectl create -f https://raw.githubusercontent.com/projectcalico/calico/v3.26.1/manifests/tigera-operator.yaml
curl https://raw.githubusercontent.com/projectcalico/calico/v3.26.1/manifests/custom-resources.yaml -O
IMPORTANT Edit the custom-resources.yaml file and change the CIDR Range to your CIDR range.
Add worker nodes to the cluster. Run this on your worker node.
kubeadm join 192.168.182.156:6443 --token ~REDACTED~ \
--discovery-token-ca-cert-hash sha256:~REDACTED~
# On your master node, verify with:
kubectl get no
kubectl get all -A
Nicely done, now you have a master and a worker node ready to run workloads!
Whats next?
Start working on something like a simple project that uses docker to build a container and push it to dockerhub. Use a yaml file to create a deployment for the image and distribute it to your worker node. Use node selectors to target a specific node. I used this github project “getting started with k8s” to get started. Your deployment yaml should look something like this.
apiVersion: apps/v1
kind: Deployment
metadata:
name: fast-api
labels:
app: fast-api
spec:
replicas: 3
selector:
matchLabels:
app: fast-api
template:
metadata:
labels:
app: fast-api
spec:
containers:
- name: fast-api
image: zebrapatch/k8-simpleapp:0.1
ports:
- containerPort: 80
resources:
requests:
cpu: 200m
memory: 300Mi
limits:
memory: 400Mi
env:
- name: ENV
value: "CIVO"
nodeSelector:
disktype: simpleapp
Run it with
kubectl apply -f deployment.yaml
# Check if your pods are up and running
kubectl get pods -A
# Do a port forwarding to your localhost:8080
kubectl port-forward fast-api-6b58c9d7f8-fms4q 8080:80 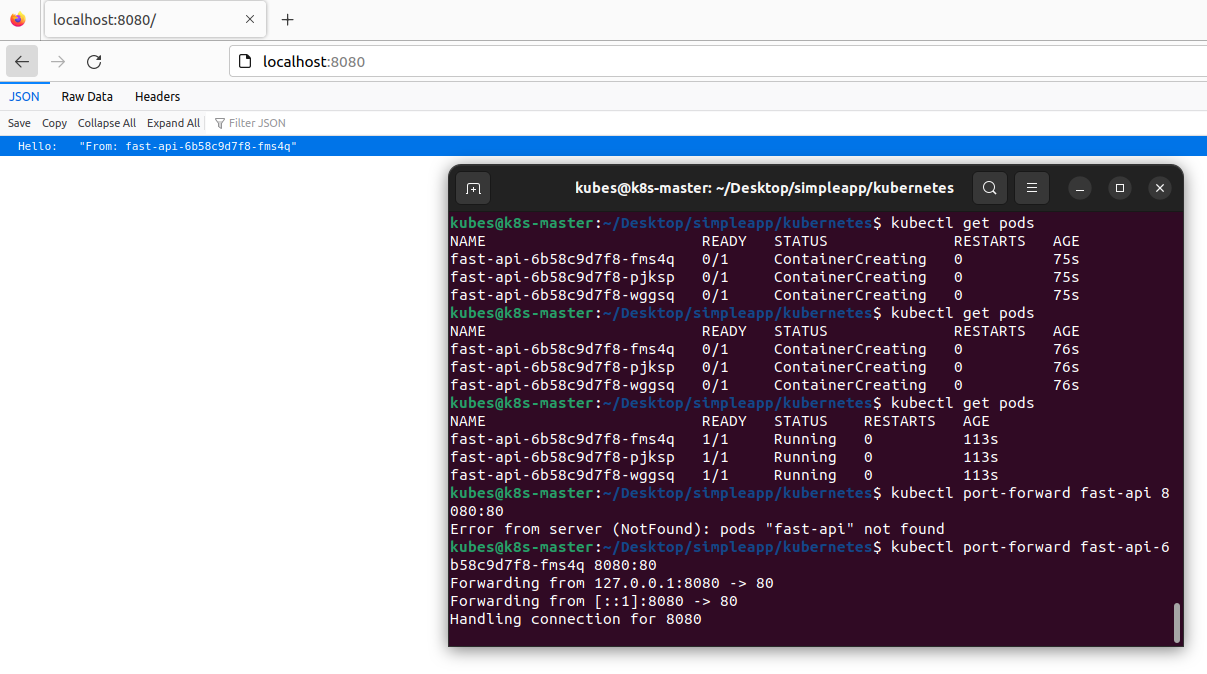
Thats a wrap!